Showing posts with label Hebridean 2 Ply. Show all posts

Sunday, April 14, 2019

Elizabeth of York - Making Progress

I have been slowly making progress on my Elizabeth of York.  Photographing it is a bit of a challenge.  I ended up pinning it to my dress maker dummy.  I did have a mistake that I had to fix - discovered after I had already worked a couple of rows past the mistake.  I ended up dropping the stitches down and pulling them back up in the correct colors.  It was not easy and I'm pretty amazed that I managed to do it.  I'm taking this one slowly on purpose, only working on it in good light and when I'm not tired or watching TV.  I really don't want to make another color mistake because they are not easy to fix.  Here is a view of the back side.

Pattern:  Elizabeth of York by Alice Starmore (from Tudor Roses)
Yarn:  Alice Starmore Hebridean 2 Ply in Wild Orchid and Spindrift
Needle:  US 2.5 (3 mm) and US 3 (3.25 mm)

Sunday, January 27, 2019

Elizabeth of York - Take Three


Here is take three.  But wait, how did we get here?  One week earlier, as they say in the movies.
I had cast on my steek stitches and was happily knitting away when I discovered that I had missed 5 purl stitches in a row, way back on row 3.  I did actually drop two of the stitches down to fix them, but it was not easy, and it was late, so I set it aside to look at the next day.  Overnight I was thinking about it and decided that I wanted to start working in the round from the start.  It seemed to me that the only reason the pattern was not being worked in the round from the beginning was because you were not using both colors on all rows, but that didn't matter to me.  I do not need my steek to be the same all the way up.  Here is the steek from take three.

So, the next morning I cast on a new start, without frogging my original start, but this time I decided to try the Wild Orchid and Corn Crake again.  I do like purple and gold.  When I restarted in the round I did not use the smaller needle, I just went with the US 3 (3.25 mm) needle and a longer cord - 32", which holds the stitches perfectly, without bunching, but without stretching.
I also replaced the knot in the bottom band with the 4 knot stitch from the body, because the bottom band knots didn't pop forward as nicely.  And I discovered that two-color purling from the right side is easier (for me at least, knitting English) than two color knitting from the wrong side.  But once I got into the body pattern I decided that the Corn Crake was not providing enough contrast with the Wild Orchid and the design was getting lost.  So I frogged back my first start with the Spindrift to reclaim that yarn, and then I frogged back my second start, but only to the first two color row - so I didn't have to redo the cast-on.  I picked my stitches back up and joined the Spindrift and started on take three.

In the interim, I also charted out the right front, back and left front fully, including the interstitial stitches and the increases.  I had charted the main pattern from the book when I was working the swatch, and later added the lines indicating where the right front, the back and the left front began, but I didn't have where they ended and of course once I started working the increases I had to remember how many stitches to shift things and that was just getting to be too much work.  It was very easy just to create three new charts (save as is a wonderful feature) and then copy the appropriate columns to extend the charts out on either side of the main repeat (marking the repeat with borders) and then add a column for the interstitial stitches, plus add the columns for the increases and gray out the stitches appropriately.  I even put in the increase stitches so I wouldn't have to remember which way they needed to lean.  And the best part?  I can ditch the stitch markers, which were just getting in my way.

Pattern:  Elizabeth of York by Alice Starmore, from Tudor Roses
Yarn:  Hebridean 2-Ply in Wild Orchid and Spindrift
Needle:  US 3 (3.25 mm)

Sunday, January 20, 2019

Elizabeth of York - Bottom Band Done

I knit the swatch for this pattern (and made gauge!) last October, but it has taken me a while to sit down and figure out the pattern sizing and start working it.  When working these patterns I study them pretty thoroughly before I start knitting.  I will even type up and rewrite instructions for my unique size.  I find that the process really helps me understand what is going on with the pattern.  Last night I finally sat down with the pattern and the measurements and figured out what I needed to do for the body (for the most part), and so I caked up my yarn and cast on.  I am now ready to cast on the steek stitches and set up for working the pattern.  I hope the knots will pop out more towards the right side of the work when I block it, they keep wanting to go towards the back.

I was going to use Wild Orchid and Corn Crake as my colors, but changed my mind and went back to the original background color that I ordered with the Wild Orchid - Spindrift.  I actually started knitting with the Corn Crake but it seemed to compete too much with the Wild Orchid, so I tinked back and reknit the piece.

Pattern:  Elizabeth of York by Alice Starmore, from Tudor Roses
Yarn:  Hebridean 2-Ply in Wild Orchid and Spindrift
Needle:  US 2.5 (3 mm) and US 3 (3.25 mm)

Wednesday, October 10, 2018

Tudor Roses - Elizabeth of York - Swatch Done

This past weekend I finished up the Nordic Christmas test/sample knit for The Unique Sheep, so I have time for my own projects again.  As the name implies, the Nordic Christmas shawl involves colorwork.  It was my first real colorwork project and I found it to be somewhat challenging.  I now understand why you generally don't use superwash wool for stranded colorwork, and why you knit stranded colorwork in the round (wrong side rows in stranded colorwork can be a challenge), but I also discovered that I really enjoy stranded colorwork.  It has been two years since I worked on a project from Tudor Roses by Alice Starmore.  As readers may recall, I have a goal of working every single pattern in the book.  I have completed the first two patterns, but I balked at the third pattern because it involved, you guessed it, stranded colorwork.  Having successfully completed a colorwork project I decided I was up for the challenge, so I grabbed a couple of leftover skeins and did the gauge swatch.  I'm happy to say that my gauge is spot on, with the needle size called for.  In the past I have had trouble getting the gauge called for because my knitting was a little too loose.  But lately I've been paying more attention to my gauge and how I tension the yarn and form my stitches, so I can control it more effectively.

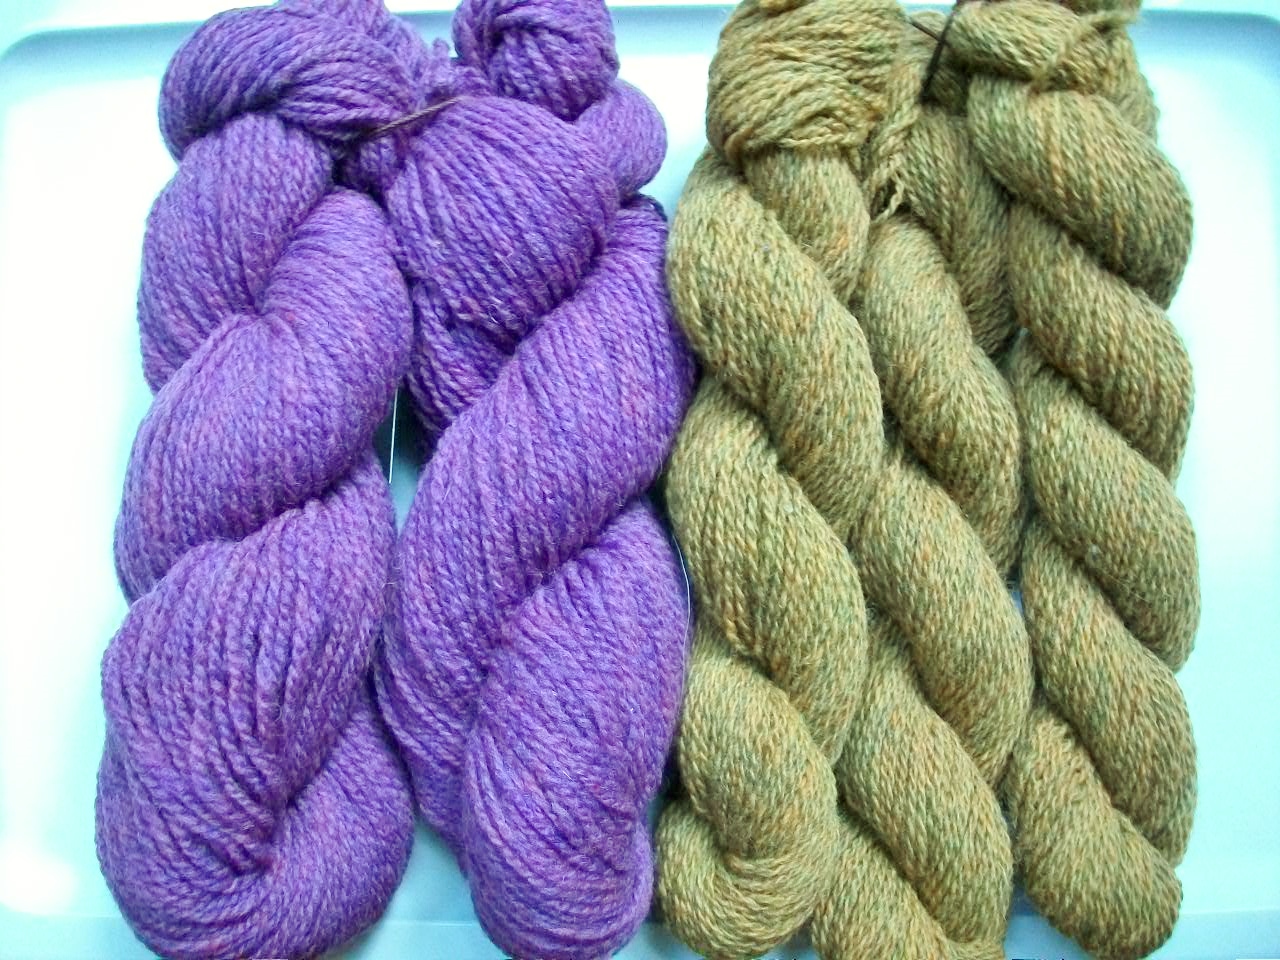
I still have many challenges ahead with this project.  No single size fits me, so I will have to figure out how to combine several sizes, and I will have to steek and cut my knitting!  The colors in the swatch are not the colors that I will be using for my project.  These are the colors I will be using:  Wild Orchid and Corn Crake.

Pattern:  Elizabeth of York by Alice Starmore, from Tudor Roses
Needle:  US 3 (3.25 mm)
Yarn:  Hebridean 2-Ply


Sunday, February 21, 2016

Tudor Roses - Elizabeth Woodville - Finished!

I finished up the knitting last weekend, but had to wait until this weekend for the buttons to arrive.  I found some metal buttons with a crest on them at M&J Trimming, which is where I go for ribbons and buttons.  For this project I picked a metal crest button in Antique Brass and 15 mm size.
I happen to have a full length skirt that I made out of silk that matches almost perfectly.

Pattern:  Elizabeth Woodville, by Alice Starmore from Tudor Roses (2013 edition)
Yarn:  Alice Starmore Hebridean 2 Ply (277 g in Red Rattle & 50 g in Whin)
Needles:  US 3 (3.25 mm)

Thursday, February 11, 2016

Tudor Roses - Elizabeth Woodville - Collar Done!

Not the best picture, I had to turn on the overhead light, but I wanted to get a progress picture before I started on the front bands.  The collar was pretty straight forward, although I did some tweaking because I wrapped on all my turns.  The decrease rows did a k2tog on those stitches with the next stitch, but there was no way that I was going to do that and work the wrap, so I adjusted my working of additional stitches on the previous short rows so I would work the k2tog just before my wrapped stitch and I could work the wrapped stitch as part of the next addition of stitches.  I had to be careful how I did the adjustments so I didn't mess up the stitch counts and thus the shaping.  It did take a little trial and error, some math, and a lot of counting, but I got it all to work out.  I've also been scoping buttons on line, but haven't made any definite decisions yet.  It is exciting to see it coming together, and even more exciting is the fact that it fits me perfectly.

Pattern:  Elizabeth Woodville, by Alice Starmore from Tudor Roses (2013 edition)
Yarn:  Alice Starmore Hebridean 2 Ply (277 g in Red Rattle & 50 g in Whin)
Needles:  US 3 (3.25 mm)

Sunday, February 7, 2016

Tudor Roses - Elizabeth Woodville - Two Sleeves Done!

Having figured out all of the shaping on the first sleeve, the second sleeve went quickly.  Now on to the collar and the button bands.  The collar should be pretty easy.  I've looked through the directions and I did not modify the neck shaping.  Because I modified the length, I shall have to pick up stitches on the front before I work the button bands so know how many picots to work for the cast on.  I also need to find buttons.  I shall check my stash first to see if I have anything suitable.

Pattern:  Elizabeth Woodville, by Alice Starmore from Tudor Roses (2013 edition)
Yarn:  Alice Starmore Hebridean 2 Ply (277 g in Red Rattle & 50 g in Whin)
Needles:  US 3 (3.25 mm)

Saturday, February 6, 2016

Tudor Roses - Elizabeth Woodville - One Sleeve Done!

I have mostly been working on this project this week.  I started working the first sleeve this past Sunday, picking up 77 stitches around the edge of the armhole.  After finishing the short rows to work the sleeve cap I worked the sleeve straight until row 48, which is just past my bicep.  I have fairly muscular arms and I always have to adjust sleeve shaping to keep the upper sleeve from being too tight.  Once I hit row 48 I did my decreases every 6 rows.  This is a little closer than is typical for sleeve shaping, but I like how it worked out on this pattern - it looks very period appropriate.  When I got to the cuff I worked the short row shaping and did increases instead of decreases, since I was working top down instead of bottom up.  I did a picot bind off to match the picot cast on.  The sleeve fit is perfect, close but not snug, nicely conformal.  The picots flip up until they are blocked.  My yarn usage is looking good too.  I checked what I have left of the Red Rattle and I shouldn't run out, but I am glad that I bought an extra skein.  With these patterns I am always buying a little extra yarn, just to make sure I have enough.


Pattern:  Elizabeth Woodville, by Alice Starmore from Tudor Roses (2013 edition)
Yarn:  Alice Starmore Hebridean 2 Ply (277 g in Red Rattle & 50 g in Whin)
Needles:  US 3 (3.25 mm)

Sunday, January 31, 2016

Tudor Roses - Elizabeth Woodville - Body Done

Last weekend I raveled and reclaimed the yarn from my initial start.  With all of the snow we stayed home on Monday, so I was able to finish up the body increases and work the left front and get a good start on the back.  Yesterday I finished up the back and the right front and joined the shoulders.  I pinned it out and spritzed it last night so I could check the fit.  I am very happy with how this is coming along.  The fit is perfect, just the right amount of ease, and the length is good.  I extended the depth of the armhole and did short row shaping on the shoulders, joining them with three needle bind off.  I will now pick up stitches around the armhole so I can work top down set-in sleeves, my preferred method.  It is so exciting when a fitted pattern comes together like this.  All of the prep work that I did has really paid off, and I have learned so much.  I didn't even mind knitting the bottom part twice.  It is worth it to get the finished results that I want.  I now feel confident that I can work through all of the patterns in this book, which was my original intent when I first looked through it.  I already have the yarn for the second pattern, and I've been looking at the third pattern and thinking about colors.

Here is the view from the back.


I have become a real fan of pinning and spritzing a work in progress to get a quick check on fit and drape.  It provides many of the same benefits as a full blocking, but is so much quicker.


Pattern:  Elizabeth Woodville, by Alice Starmore from Tudor Roses (2013 edition)
Yarn:  Alice Starmore Hebridean 2 Ply (277 g in Red Rattle & 50 g in Whin)
Needles:  US 3 (3.25 mm)

Sunday, January 24, 2016

Tudor Roses - Elizabeth Woodville - Increases Halfway Done, Almost

After pinning and spritzing last time I tried the fit so far and decided that I really needed more ease in the hips and that I also wanted the peplum to extend further down from my waist.  The original pattern does not extend far past the waist, and given how high waisted I am, that makes for a pretty short torso.  I pulled the needles out of my knitting, and cast on again.  I decided to go up a size for the bottom part, and work all of the decreases.  I also worked 3 rows between each of the decreases, whereas the pattern has the last few decreases occurring every other row.  This allows me to extend the peplum further down, and makes the shaping a bit more gradual than the pattern.  I switched back to the smallest size for the increases, which means that I will only work 9 of the 12 increases.  This gets me to the correct stitch count for the bust measurement of the smallest size.  I am also spacing the increases out more, working 5 rows between the increases instead of 3.  I pinned and spritzed my progress today so I could check my fit again.  I have completed 4 of my 9 increases.  At some point I will ravel and reclaim the yarn from my previous effort.

Pattern:  Elizabeth Woodville, by Alice Starmore from Tudor Roses (2013 edition)
Yarn:  Alice Starmore Hebridean 2 Ply (277 g in Red Rattle & 50 g in Whin)
Needles:  US 3 (3.25 mm)

Sunday, January 17, 2016

Tudor Roses - Elizabeth Woodville - Making Progress

I've been working mostly on this project and making steady progress. I actually ripped back to the start and redid all of the hem shaping wrapping all of my turns, which I think gives a neater appearance.  I could see small holes where I hadn't wrapped on the rows that turned against the garter row as opposed to the ones that turned against a stockinette row, where I did wrap.  Those little holes were bugging me, so I ripped and redid.  I've almost worked two complete skeins, but the piece was curling something fierce and it is hard to really see what you've got so last night I pinned it out and spritzed it to make it behave a bit better, and I'm glad to say that it worked.  I need to figure out my upper body shaping, where to start working the armholes because I need them to be deeper than the pattern is calling for, and my brain is a bit too fuzzy for that today (darn head cold), so I think I will go work on my Summer Breeze socks (I just have to finish up the leg of sock number 2) and read some more Phryne Fisher.


Pattern:  Elizabeth Woodville, by Alice Starmore from Tudor Roses (2013 edition)
Yarn:  Alice Starmore Hebridean 2 Ply (277 g in Red Rattle & 50 g in Whin)
Needles:  US 3 (3.25 mm)

Sunday, January 10, 2016

Tudor Roses - Elizabeth Woodville - Fresh Start

Almost exactly 2 years ago I started working on this project but I didn't get very far.  I knit one sleeve using different colors but I was worried about gauge and fit.  I did a couple of restarts but was never really happy with the results so I put it in a timeout.  It didn't help that I knocked a Dr. Pepper over and splashed a not insignificant amount into the project bag.  In the intervening years I have bought several of the color work kits they have offered, yarn for the second project in the book, and new yarn for this project.  This time I purchased more yarn than my size called for, to give me some cushion.  The original yarn will not go to waste, I'll use it for sampling and swatching.  Last week I pulled the yarn and the book back out and decided to go back to basics.  I swatched again, using the previous yarn.
The swatch on the right was done on the needle size the pattern calls for (4 mm), but is too loose.  It is not a bad fabric, if I wanted a wrap that had some drape.  I then swatched on US 3 (3.25 mm) and hit the gauge spot on.  I have gotten pretty good at knowing what size needle I should use with yarn to get the right gauge.  I then spent last week reading over the pattern and comparing the measurements of the schematic with my measurements.  The smallest size mostly works for me, but I'm high waisted and small on top, I need a deeper armhole, and my shoulders are fairly broad.  Yesterday I finally cast on.  This time I'm using Red Rattle as the main color and Whin as the contrast color.

These are far more my kind of colors than the original colors that I picked.  I like jewel tones.  I decided to work the body in one piece up to the armholes.  Instead of the cast on called for in the pattern - making a chain of picots and then picking up stitches - I did a regular picot cast on, knit two rows and then did the colorwork and switched to the main color as the pattern called for.  For the short row shaping I did each section separately, but did not break the yarn between sections.  I started with the right front and worked through the last right side row of the fourth decrease.  I then knit across to where the short rows start for the back and worked through the last right side row of the fourth decrease.  Because I had knit across to where the short rows started I wrapped and turned when I was working on that side of the back because I didn't have that purl ridge to work with.  I then knit across the left front and worked through the fourth decrease, wrapping and turning.  Then I purled back across the entire body, picking up any wrapped stitches as I went.  I'm skipping the decreases on the body and going right to the straight section after the last body decrease.  I'll work 4 fewer increases to compensate for not working the decreases.  I think this will shorten the body enough to account for my high waist.  I'll start the armholes early, to give me more room, and I'm going to knit the sleeves from the top down in the round, which should give me the fit that I need.


Pattern:  Elizabeth Woodville, by Alice Starmore from Tudor Roses (2013 edition)
Yarn:  Alice Starmore Hebridean 2 Ply (277 g in Red Rattle & 50 g in Whin)
Needles:  US 3 (3.25 mm)

Sunday, January 19, 2014

Tudor Roses - Elizabeth Woodville - One Sleeve Done

Last year Alice Starmore came out with an updated edition of her book Tudor Roses.  I have several of her books and have always loved her designs but I have never knit any of her patterns until now.  The updated designs in this new edition are beautiful, elegant, classic and I want to knit every single one, so that is my plan.  The patterns, fourteen in all, are inspired by women connected with the Tudor dynasty.  The book itself is beautifully put together, hard cover, over-sized, with heavy gloss paper.  It could easily be a coffee table book.  When I opened it and started leafing through the patterns I gasped in astonishment and pleasure and instantly fell in love.  I am starting at the very beginning with the first pattern - Elizabeth Woodville.  I am using the recommended yarn for the patterns, which I am purchasing directly from the Starmore's via their web site Virtual Yarns, although I am choosing my own colors.  The original design calls for Spindrift and Selkie.  I picked Corncrake for the main color and Mara for the contrast.

Pattern:  Elizabeth Woodville, by Alice Starmore from Tudor Roses (2013 edition)
Yarn:  Alice Starmore Hebridean 2 Ply (250 g in Corncrake & 31 g in Mara)
Needles:  US 2.5 (3 mm)