Showing posts with label Bead On It. Show all posts

Sunday, February 2, 2014

Japanese Flower

I bought this kit from Blue Buddha Boutique a couple of years ago at Bead & Button and it has been sitting in my bead stash every since.  I pulled it out over the Christmas holidays and had a slight heart stopping moment because the directions were not with the kit.  Fortunately I remembered that I had bought this kit the same year that I had taken a class and I knew where all the material was for the class (I haven't finished that project yet either).  Sure enough, the instructions were in the bag with the class materials.  I pulled the kit out last night and finished the project up this morning.  It was pretty easy and I quickly got the hang of hooking the rings.  The instructions were good - I'm a visual person so I like lots of pictures - and they had great tips to make the process easier, like laying out all of your rings before you start each flower.
I used the large Bead-On-It Board that I bought last year at Bead & Button as my work surface and it worked extremely well, plenty of space without being too big.
Project:  Japanese Flower by Rebeca Mojica
Materials:
Aluminum Rings: D = 1/8", 20 gauge
Red Enameled Copper Rings:  D = 1/8", 20 gauge
Aluminum Rings:  D = 3/16", 18 gauge
Toggle Clasp

Saturday, January 11, 2014

Nouveau Navettes


Interweave has recently been offering kits, all sorts of kits, and I've purchased a few - mostly weaving kits, but also beading kits.  I ordered this one last Monday and received it yesterday.  All of the other beading kits that I have ordered have been seed bead kits, this is the first time I've done anything with chain.  I decided to try the kits because I thought it would be a fun way to try some new techniques and new bead shapes/types that I don't have in my stash.

I decided to do this kit last night because I was tired and didn't feel like knitting, and didn't want to fall asleep on the daybed after supper, which I have been doing on a fairly regular basis lately.  It is a strange thing, but when I bead time just seems to stand still and my fatigue and any worries just fade away.  I put this necklace together in about 4 hours.  The instructions were a bit skimpy, and I didn't really like their order of construction so I modified things a little.

I started out mounting the sparklies in their settings.  That was easy, and was the first step in the instructions.  Then I cut the chain for the two top strands to the length in the instructions (7 1/4 inches and 7 3/8 inches) and whatever was left became the third strand.  I put the two top strands on a jump ring and started adding the beads on the head pins.  I worked from left to right.  The head pins are attached to the bottom strand with small jump rings.  After I had all of the beads on the head pins attached to the top two strands I attached the other jump ring on the right side, and attached the bottom strand of chain.  When attaching the head pins to the bottom strands I worked from both sides to the middle, alternating.  I did this because the spacing didn't seem to be working out right when I worked from one side, by working from both sides in I could at least make sure that the spacing was consistent and symmetrical.  Then I attached the dangling sparklies to the bottom chain, centering them as best I could between the head pins.  All that was left was to attach the larger chain and the clasp.  Easy peasy.

The necklace has some weight to it, so it hangs pretty well.  The two smaller beads are glass and the large ones are lucite.  If you wear it as designed it hangs down a bit and the curve is compressed, so I put the clasp into the chain itself to pull it up so it hangs just below my collar bone, which also opens up the curve into a nice arc pretty much as you see it laid out here.  I worked this necklace on one of my beading trays (you can see it in the background of the picture).  You will recall that last year I came home from Bead & Button with a large rectangular bead tray.  Last month I ordered a second one - a 12 inch circular one, which I thought would be perfect for working from while sitting on the daybed.  It was.  You can get your own Bead On It Beading Board here.  They are a little spendy, but well worth it - beautifully made and wonderfully functional.

Project:  Nouveau Navettes, kit available from Interweave

Saturday, June 15, 2013

Bead & Button 2013 - Swag on Display

Another Bead & Button Show has come and gone and I spent more than I thought I would.  The show was slow so I had plenty of opportunity to shop.  One of the things that I bought was a beading board.  I usually bead on a small folding table, but this will allow me to bead on my daybed.
You can pin into the edge, and the chenille of the work surface makes your beads lay flat so the hole is facing up, making it easier to get them on your needle.  These are hand made in the USA and the construction and materials are beautiful.  You can find them at the Bead On It Shop.

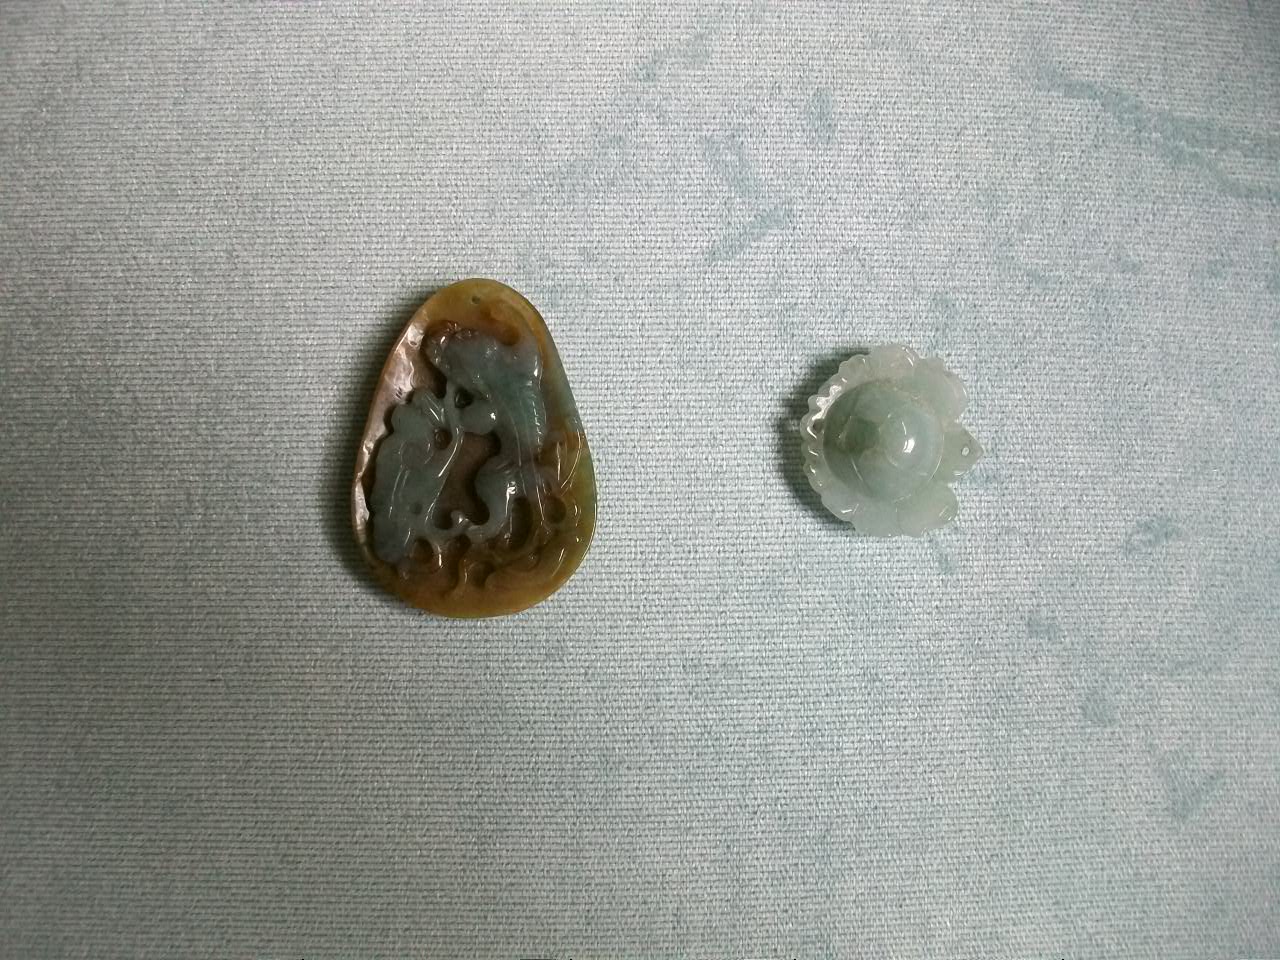
The first pieces that I bought were actually bought before the main show started, at ArtAsia, a favorite shop that we always go to.
Two lovely pieces of carved jade.  I will probably bead around the one on the left, even though it has a hole for hanging.  The one on the right will become the centerpiece of a beaded bracelet.

During setup, Carol dragged me by a booth selling boulder opal.  We picked out a number of pieces for the vendor to set aside and these are the five that I ended up getting.  I had always read about the fire in opals, but had never really seen it until I saw these stones.

Once the show started, the first beads I spotted were lampwork beads by Joy Munshower.
The octopus caught my eye first.  I have a weakness for octopuses, they are just so cool, and so smart.  Then I spotted the alien sea slugs.  She makes these with leftovers, using up canes and just having fun with abstract shapes and colors.  The pipe cleaners are color coded and indicate the price.

I had to stop by and see Cynthia Rutledge.  We don't get to spend much time together, but I really like her and her husband, Mark.  He gave me some quick back massages during the show.  They are a lovely couple.  She had the bead boards at her booth, and also lovely cameos.
This one is of the goddess Diana, as you can tell by the crescent moon in her hair.  It is from the 1870s and I just had to have her.  She also had some contemporary cameos that were exquisite.  It is nice to know that the art is still alive and well.
She also had this interesting tool.  I missed it, but Carol spotted it so I had to go back and get one.  It is actually for making lace, but you can also use it for starting beaded tubes.  Very cool.

My sister, Virginia, bought some beads from Harold Williams Cooney that looked like seeds.  I had bought beads from him before (the necklace on the left in the first photo), so on Saturday I swung by his booth.  I spotted the seed pod first and asked him to set it aside for me as I didn't have my check book with me (he doesn't take plastic), but he put it in a zip lock bag and told me to take it with me and pay him later.  When I went back on Sunday to pay him, I spotted the strand of beads that I thought would go well with the seed pod.

Of course I also hit the gemstone tables.  You can't have too many strands of gemstones.

During my one day layover in Yellow Springs I swung by Unfinished Creations.  I really wanted to show the owner, Pam, what I had done with some of the things that I had bought from her, but, alas, she was not there.  She was on vacation.  I did, however, get some more amethysts.
I used the flash so you can see how brilliantly they sparkle.  They will make a stunning necklace.